I’ve always been the type to just try to figure things out! When my oldest kiddo went to her first school dance, I helped order the boutonniere. I was pretty shocked at the cost for a boutonniere that was essentially just one little rose, baby’s breath, floral tape and a stick pin to attach it to the suit coat. I figured out later if I made it at home I could make a better product for less money. I could make it beautifully, in a short amount of time and attach a cool magnet that would make that awkward date moment of trying to attach the boutonniere SO. MUCH. EASIER. AND save money? Done! This is a win-win! When my son came along, creating a wrist corsage seemed like the next step.
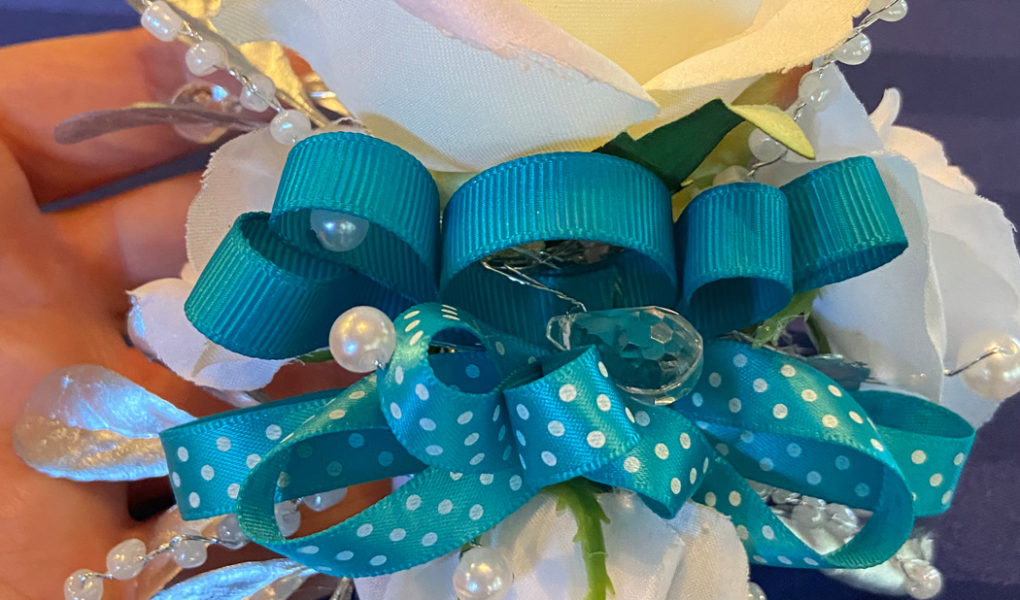
I have created a video to show you the wrist corsage I made for this week’s Prom. The girl’s dress is turquoise and silver. Over the years, I’ve just learned to have on hand a few materials that make it easier when formal dances roll around. Plus, it’s a bit of fun to create something that sparkles and completes the outfit. These are the items I have on hand: I have added links to Amazon, which if you use, they will give me a tiny commission. Please know you can wander to Hobby Lobby, Michael’s or JoAnn’s if you wish! 🙂 Have Fun!
- Floral Corsage Bracelet or Wrist Corsage Elastic Bands I have used both types and they are easy to work with. In the video, I am using a bracelet I purchased from Michael’s.
- Felt: If you are using a bracelet that was not created for a corsage (like I did). Then make a one inch+ band of felt for a space to glue the flowers and greenery while still keeping the bracelet soft for the wearer. (Also make sure the bracelet runs fairly snug) You could also do a “working space” with other fabric you may have on hand. Just make sure the fabric is plain and doesn’t detract from the design. If you are using a wrist elastic band, it comes with the clamps to hold the flowers, but I often still use a square of felt for a base.
- Flowers! In most instances I have white rosebuds on hand, and a variety of ribbon, but I have been known to go on a “perfect color” ribbon hunt before. If the dress is pink, feel free to match it with the flowers! Or if the dress is black or silver, red roses can be stunning. I have used a variety of silk flowers and a couple of times I have used fresh flowers as well. Fresh flowers are beautiful, but I do love the convenience of silk, because then I can make the corsage a week or days ahead! Try to buy medium to small flowers! The large ones would quickly overpower the corsage.
- Wire Cutters These are used to cut the flowers although some tough scissors can make due in a pinch!
- Green Foliage: In the video I use silver to match the girl’s dress, but I most often use green. Eucalyptus is pretty trendy right now, but look around you can find greenery almost anywhere! Check out these.
- Bling: This part is fun! Adding the sparkle that brings the whole piece together. If you were to peruse the flower department at Hobby Lobby you will find many options, but these also are lovely!
- Ribbon: This is the crux of the color match for the Prom, Mother’s Day, Graduation or weddings! So choose well! 🙂 I have used organza ribbon as well as wire edged ribbon. You can work with your preference.
- Glue Gun & Glue Sticks: A must! How did people manage before glue guns? A lot of wire I suppose!
- A Cutting Mat: This is not necessary, but I love to use mine, just to have a space for wire, scissors, melted glue sticks and etc. You can simply lay out paper towels if you wish. Just create a space for making a small mess and getting creative. 🙂
As far as design, many times I will fabricate either a triangle with the main flowers, or a diamond shape with the flowers and then fill in with greenery, bling and ribbon. I have used large flowers and tiny blue flowers…there are lots of fun possibilities!
It is less expensive to create a wrist corsage at home, no doubt, but if you do not own a glue gun (it’s probably time), then there will be start up costs. For the wrist corsage I created in this video, I did not have to buy anything new, because I simply had the supplies on hand from former projects and corsages. I estimate the cost of the wrist corsage including the jeweled bracelet to be around $10. Compared with a corsage from a florist that would often be $30 or more.
So what are you waiting for? You got this! I would love to see what you create! 🙂 Have fun!
I love this! You have made it so easy to reproduce. Exactly what I needed in a pinch.
Thanks for coming by Julie! 🙂